
Introduction: Why Prep Work is the Secret to a Flawless Interior Paint Job in Silver Spring, MD
You’ve picked the perfect color, envisioned your refreshed living space, and you’re ready to dive into an interior painting project. But before the first brushstroke, there’s a critical phase that determines the success and longevity of your new paint job: the preparation. In Silver Spring, MD, where homes range from charming historic properties to modern constructions, proper interior painting prep tips are not just recommendations – they’re essential for achieving a truly professional, lasting finish.
Many homeowners underestimate the importance of preparation, often viewing it as a tedious chore. However, skipping or rushing these vital steps is the most common reason paint jobs fail, leading to peeling, cracking, or an uneven appearance. At Avishay Handyman LLC, we believe that meticulous preparation is the most important step in interior painting prep. It’s the foundation upon which beauty and durability are built, ensuring your investment in a fresh coat of paint truly shines. Let’s explore the crucial steps that make all the difference for homes in Montgomery County.
Step 1: Clearing and Protecting Your Space (Furniture, Floors, Fixtures)
The first step in any successful interior paint job is to completely clear and protect the area. This isn’t just about keeping paint off your belongings; it’s about creating a safe, unobstructed workspace that allows for thorough and efficient preparation.
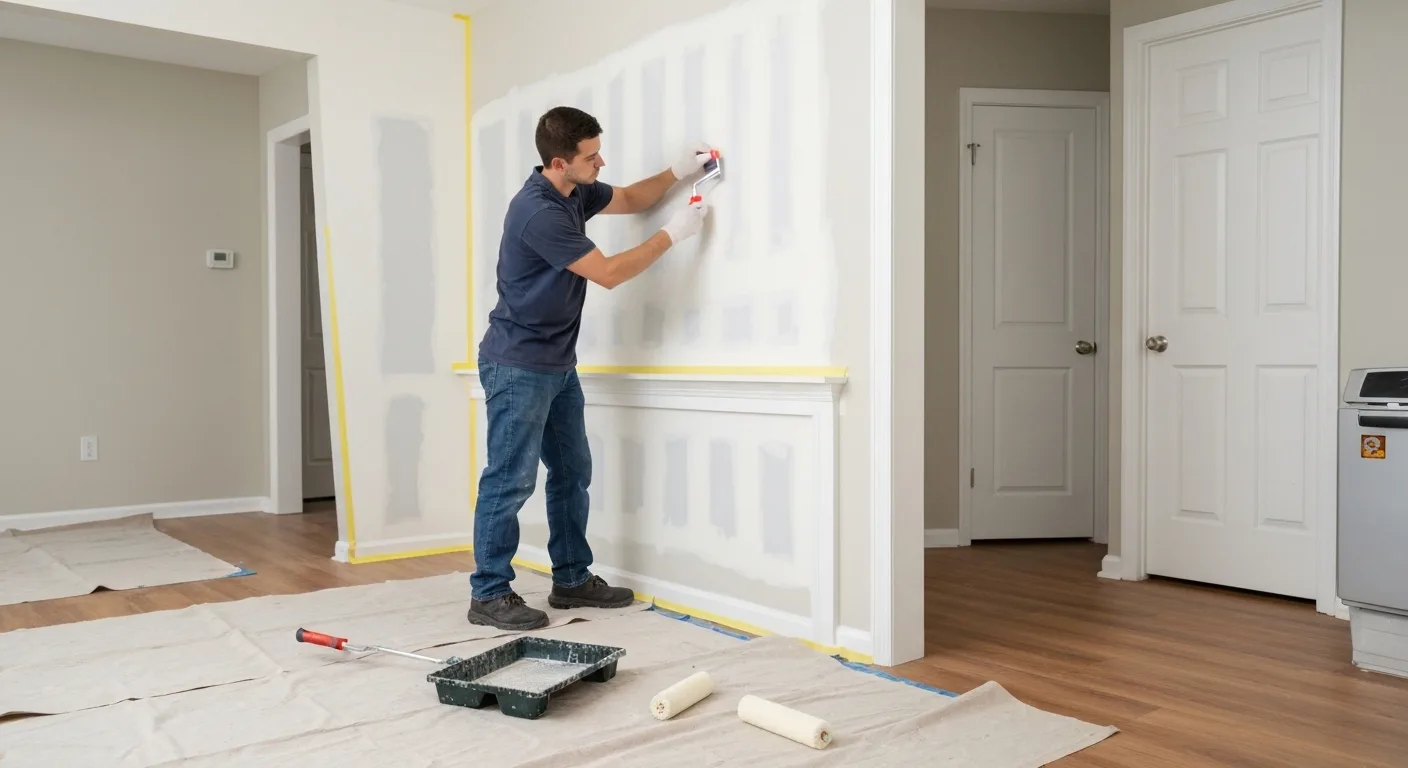
- Remove Everything Possible: Take down wall decor, curtains, blinds, and light switch/outlet covers. If possible, remove all furniture from the room. For larger items that can’t be moved, push them to the center of the room and cover them completely with plastic sheeting or drop cloths.
- Protect Your Floors: This is non-negotiable. Use canvas drop cloths, not thin plastic, for floors. Canvas is more durable, less slippery, and absorbs spills rather than letting them pool. For homes in Silver Spring with historic hardwoods or intricate tile work, extra care is paramount. Overlap drop cloths slightly and secure them with painter’s tape to prevent slippage and ensure full coverage right up to the baseboards.
- Cover Fixtures and Built-ins: Use painter’s tape and plastic sheeting to meticulously mask off any light fixtures, ceiling fans, and built-in shelving or cabinetry that won’t be painted.
- Dust Control is Key: In our experience working on countless Silver Spring homes, we’ve found that proper dust containment is crucial, especially in older properties with intricate trim work or during extensive drywall repairs. Covering furniture and sealing off doorways with plastic helps contain dust, making cleanup easier and preventing particles from settling on your freshly painted surfaces. This proactive dust control painting Silver Spring residents appreciate ensures a cleaner finish and healthier environment.
Step 2: The Deep Clean – Why Washing Walls Matters for Paint Adhesion
Once your space is clear and protected, the next vital step for interior paint surface preparation is a thorough cleaning. Many ask, “Do you need to wash walls before painting?” The answer is an emphatic yes! Paint needs a clean, dry surface to adhere properly. Over time, walls accumulate an invisible layer of dust, grime, grease, fingerprints, and even cooking oils, especially in kitchens and high-traffic areas. Attempting to paint over these contaminants is like trying to glue something to a greasy surface – it simply won’t stick effectively, leading to premature peeling and a patchy finish.
For most walls, a simple solution of warm water and a mild, non-abrasive cleaner (like TSP substitute or dish soap) is sufficient. Use a soft sponge or cloth, working from the bottom up to avoid streaks. Rinse thoroughly with clean water, wiping from top to bottom. Pay extra attention to areas around light switches, doorframes, and baseboards. Allow ample time for the walls to dry completely – typically 24 hours, especially in humid Maryland weather – before moving on to the next step. This deep clean is a cornerstone of effective house painting preparation Montgomery County homeowners should never skip.
Step 3: Repairing Imperfections – Patching, Sanding, and Caulking Like a Pro
This is where the true craftsmanship of a lasting paint job begins. Smooth, uniform walls are the canvas for beautiful paint. Ignoring imperfections will only highlight them once the new paint is applied.
- Patching Holes and Dents: Use spackle or joint compound to fill in nail holes, minor dents, and small cracks. Apply in thin layers, allowing each to dry completely before applying the next. For larger holes or significant damage, especially common in older Silver Spring homes with plaster walls, more extensive drywall repair may be needed. Avishay Handyman LLC is skilled in addressing all types of paint wall repair Silver Spring properties might require, from minor fixes to complete drywall installation.
- Sanding for Smoothness: Once patches are dry, lightly sand them flush with the wall surface using fine-grit sandpaper (120-180 grit). You’re aiming for a seamless transition. Also, lightly sand any glossy areas or rough patches on the existing paint to create a “tooth” for the new paint to grip onto. After sanding, wipe down the walls again with a damp cloth to remove all dust, which is crucial for how to prep walls for painting MD homes.
- Caulking Gaps: Inspect all trim, baseboards, and window frames for gaps where they meet the wall. Use a high-quality acrylic latex caulk to fill these gaps. A thin, even bead of caulk creates a clean, finished look and seals out drafts. Smooth the caulk with a wet finger or a damp sponge for a professional finish.
- Addressing Older Homes: For many older Silver Spring homes, especially those built before 1978, there’s a possibility of lead-based paint. While Avishay Handyman LLC ensures all our work adheres to Montgomery County building standards, addressing lead paint requires specialized handling. If you suspect lead paint, it’s always best to consult with professionals who are trained and certified to manage such materials safely, ensuring the health and safety of your family.
Step 4: The Primer Debate – When to Prime and What Type to Use
Primer is the unsung hero of many painting projects. It acts as a bond between the wall surface and the paint, enhancing adhesion, providing a uniform base, and often reducing the number of topcoats needed.
- When to Prime:
- Bare Surfaces: Always prime new drywall, spackle, or bare wood to seal the porous surface and ensure even paint absorption.
- Color Changes: If you’re painting a light color over a dark one, or vice-versa, primer will help achieve true color faster and prevent bleed-through.
- Stain Blocking: For walls with water stains, smoke damage, or grease marks, a stain-blocking primer is essential to prevent these imperfections from showing through your new paint.
- Glossy Surfaces: If you’re painting over existing oil-based paint or a high-gloss finish, a bonding primer will help the new paint adhere.
- Types of Primer:
- Water-Based (Latex) Primers: Ideal for new drywall, porous surfaces, and general use. Easy cleanup.
- Oil-Based (Alkyd) Primers: Excellent for stain blocking, wood, and previously painted surfaces. Provides superior adhesion but requires mineral spirits for cleanup.
- Shellac-Based Primers: The best for extreme stain blocking (smoke, water damage, odors) and knot sealing on wood. Dries quickly but is strong-smelling.
Step 5: Taping and Masking for Crisp Lines
Achieving those crisp, clean lines that define a professional paint job comes down to careful taping and masking. Don’t rush this step, as poorly applied tape can lead to messy edges and paint bleeding.
- Choose the Right Tape: Invest in high-quality painter’s tape. Blue painter’s tape is typically good for general use, while delicate surface tape is better for freshly painted areas or wallpaper. Look for tape that promises clean removal without residue.
- Apply Carefully: Press the tape down firmly along the edges of trim, baseboards, window frames, and ceilings. Ensure there are no gaps or bubbles where paint could seep underneath. Using a putty knife or credit card to press down the edges can help create a tight seal.
- Mask Larger Areas: Use painter’s tape to secure plastic sheeting or masking paper over larger areas you want to protect, such as windows, door frames, or built-in shelving.
- Remove Promptly: For the cleanest lines, remove the tape when the paint is still slightly wet (but not tacky). If the paint dries completely, it can form a film over the tape, and removing it may cause the paint to peel. Pull the tape at a 45-degree angle slowly and steadily.
Common Prep Mistakes to Avoid (and How Avishay Handyman Prevents Them)
Even with the best intentions, DIY painters often fall prey to common mistakes that compromise the final result. Understanding “what should you not do before painting a room” is just as important as knowing what to do.
- Skipping the Clean: Painting over dirty walls is the most frequent blunder, leading to poor adhesion and premature peeling.
- Inadequate Repairs: Minor cracks or holes left unfixed become glaring imperfections under a fresh coat of paint.
- Rushing Dry Times: Applying paint to wet patches or primer can cause bubbling, peeling, or an uneven finish.
- Poor Taping: Flimsy tape or improper application leads to messy, bleeding lines that instantly detract from a professional look.
- Ignoring Lead Paint: In older Montgomery County homes, disturbing lead-based paint without proper precautions can be a serious health hazard.
As licensed and insured handyman and remodeling specialists, Avishay Handyman LLC brings extensive experience to every interior painting project. Our house painting preparation Montgomery County residents rely on is meticulous. We never skip steps, use professional-grade materials, and understand the nuances of various wall types, including plaster repair common in older Silver Spring properties. Our team is trained in effective dust control painting Silver Spring homes require and ensures every surface is perfectly prepared, guaranteeing flawless results that stand the test of time.
When to Call a Professional for Your Silver Spring Painting Prep
While many basic prep steps can be tackled by a dedicated DIYer, there are times when calling in the experts at Avishay Handyman LLC is the smartest choice. If you’re wondering how long does it take to prep a room for painting, professionals can often complete the work faster and more efficiently, especially for complex projects.
- Extensive Wall Damage: If your walls have large holes, significant cracks, water damage, or require specialized plaster repair, professional `paint wall repair Silver Spring` services are invaluable.
- High Ceilings or Intricate Trim: Reaching high areas safely and taping intricate trim requires specialized equipment and expertise.
- Time Constraints: Proper prep takes time – sometimes days for multiple rooms. If your schedule is tight, a professional team can expedite the process without sacrificing quality.
- Suspected Lead Paint: If your Silver Spring home was built before 1978 and you suspect lead paint, it’s crucial to have professionals handle the prep to ensure safety.
- Desire for a Flawless Finish: For truly impeccable results, the precision and experience of professionals are unmatched. Our `painting services` ensure every detail, from prep to final coat, meets the highest standards.
Avishay Handyman LLC serves Silver Spring, Rockville, Gaithersburg, Bethesda, Takoma Park, College Park, Chevy Chase, and Kensington, providing expert `handyman Bethesda` services and comprehensive painting solutions. We handle all aspects of interior paint surface preparation, so you don’t have to worry about the complexities of how to prep walls for painting MD homes.
FAQs About Interior Painting Prep
What is the most important step in interior painting prep?
While every step is crucial for a professional finish, the most important step is often considered to be the repair and cleaning phase. Ensuring a clean, smooth, and stable surface free of imperfections and contaminants is the foundation for paint adhesion and a long-lasting, beautiful result.
Do you need to wash walls before painting?
Absolutely, yes. Washing walls removes accumulated dust, grime, grease, and other residues that prevent paint from adhering properly. Painting over dirty walls will lead to poor adhesion, uneven finishes, and premature peeling.
How do professionals prepare walls for painting?
Professionals like Avishay Handyman LLC follow a meticulous multi-step process: clearing and protecting the space, thorough cleaning, detailed repair of imperfections (patching, sanding, caulking), appropriate priming, and precise taping and masking. They also ensure proper dust control and ventilation throughout the process.
How long does it take to prep a room for painting?
The time required for prep varies significantly based on the room’s size, the amount of furniture, and the condition of the walls. A small, empty room with minimal damage might take a few hours, while a large, furnished room with extensive repairs could take a full day or more. Professionals can often complete prep more efficiently due to their experience and specialized tools.
Ready for a Fresh Look? Contact Avishay Handyman LLC in Silver Spring, MD
Don’t let the daunting task of interior painting prep stand between you and the beautiful home you envision. At Avishay Handyman LLC, we take pride in delivering skilled workmanship and fair pricing on all our services, from kitchen and bathroom remodeling to comprehensive painting projects. We are a licensed and insured company committed to adhering to all Montgomery County building standards and using only high-quality, durable materials, a commitment reflected in our client testimonials across Silver Spring and surrounding areas.
Whether you need expert paint wall repair, thorough house painting preparation Montgomery County wide, or a complete interior transformation, no job is too big or too small for our team. Let us handle the intricate details of interior painting prep tips Silver Spring MD homes require, ensuring a flawless finish that lasts. For a free estimate and to discuss your next project, call us today at +1-240-377-0777 or contact Avishay Handyman LLC for a free estimate. We look forward to bringing your vision to life!
